This post was sponsored by Notix. The opinions expressed in this article are the sponsor’s own.
Want to increase visits to your site?
Hoping to continue nurturing visitors along their buyers’ journey to conversion?
Sending updates directly to a user’s browser or device is a powerful way to re-engage them.
Bringing users back for breaking news, sales, or an update after a while can help build trust and get more conversions.
The first hurdle is getting users to agree to push notifications.
Before you can push information to them directly, users have to give their permission. This critical point of the decision must be timed and handled well, or they’ll just hit “no thanks” and move on.
So, how do you make a good first impression?
How do you motivate users to say “yes”?
Let’s learn what push notifications are and then go through some examples of an effective push notification strategy.
What Are Push Notifications?
A push notification is a small, customizable message delivered directly to a user’s browser, desktop, or mobile device when or after they land on your site.
Push notifications are an “opt-in” service, which means that users will receive them after agreeing.
You can successfully re-engage audiences after they’ve left your website or app by using high-quality push notifications with careful push notification targeting.
You’ll be able to get greater traffic and increased customer retention with this type of engagement technique.
However, convincing people to subscribe is one of the hardest parts.
Don’t worry, these three steps can help you get started.
Step 1: Delay. Don’t Send Push Notification Requests Right Away.
Well, you can, and there’s a chance you might get a large number of subscribers that way.
But it may not be the best way to get engaged subscribers who are likely to return.
The Problem With Requests That Come Too Soon
If your push notification request pops up immediately upon landing, it interrupts the user’s search for needed content. That’s why they might end up pressing, “No thanks.”
“No thanks” means “no” or “get out of my way” to a potential new subscriber.
The Solution
Instead, try giving your visitors some breathing room.
Let your visitors see that your content is worth subscribing to.
Add a delay before you ask for permission to send notifications.
This way, you build more meaningful communication with your visitors. Let a user get to know you a little bit before you rush news into their notification center.
Once they’ve read some content and explored your site or app, they might decide if they want to come back.
Then, your request becomes a service, not an annoyance.
How To Delay Push Notification Requests
Notix lets you manage your initial requests by adding time delays, or even basing them on certain actions if you want to be sure you’re targeting highly-engaged users.
Step 2: Customize Your Push Notification Requests.
Let’s be honest. You’re likely here because you know that generic push notification requests don’t work as efficiently as you want.
The Problem With Default Push Notification Requests
Regular push notifications typically say something like “[yoursite] wants to send you alerts” followed by a choice to allow or deny permission.
If we put ourselves in the visitor’s shoes, they don’t have a good reason to say yes.
Your visitors need a reason why your content is worth a subscription. They will be more likely to subscribe if your offer and their needs coincide.
People usually visit websites with a topic or question in mind. The best course of action is to prove that you have something they are looking for.
If they see that they can easily get more content related to their search, they’re more likely to sign up!
So, give people a reason to say yes.
The Solution
Add an elevator pitch or an offer to your request to let a user know what exactly they get out of your push notifications.
You can customize the text, call-to-action buttons, and even add images.
Tailoring your push notification request can help you:
- Increase the number of subscribers.
- Understand which content your subscribers want to see.
- Learn how and when your audience reacts to the offered information.
- Customize future push notifications to ensure clicks.
How To Customize Push Notification Requests
If you have a single-focus website, a great way to customize your opt-in messages is to let the visitor know that there’s more content they might be interested in.
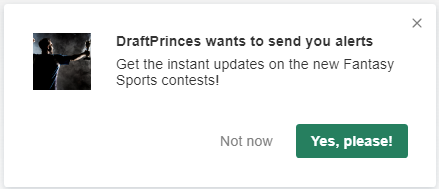
If you provide fantasy football content, think about what your readers would want more of, such as updates on upcoming contests.
 Screenshot from Notix.com, June 2022
You can take it a step further and give your readers a sense of control. Segment your audience and customize the content they receive.
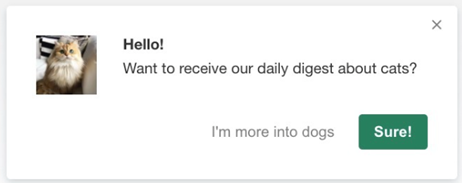
With this example, you’ll be able to make sure cat lovers stay engaged with only cat-centric content. Yes, you can do the same for dogs.
 Screenshot from Notix.com, February 2022
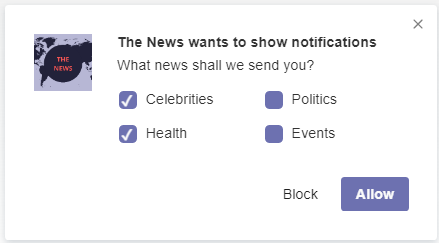
If you own a larger website that hosts multiple topics, consider giving your readers a choice.
Not only does this give your visitor a sense of control, but it also increases overall awareness of what your brand offers as well as increases your engagement rates in the long term.
Platforms like Notix let you create fillable forms to improve campaign targeting and user experience:
 Screenshot from Notix.com, June 2022
Step 3: Send Custom Push Notifications To Keep People Engaged.
Now comes the fun part – seeing continued growth by keeping your engaged subscribers around.
The Problem With Blanket Push Notifications
Many companies offer content that may not connect with the audience, while other companies offer every piece of new content without a plan.
This can quickly lead to a disengaged audience – people don’t really subscribe to get random content.
Subscribers crave content that is tailored to their continued needs.
The Solution
Provide relevant and catchy customized push notifications to keep your content visible and clickable.
Your push notifications should provide customized experiences that reflect subscribers’ interests and needs.
If you’ve followed step two of this strategy, you should be all set.
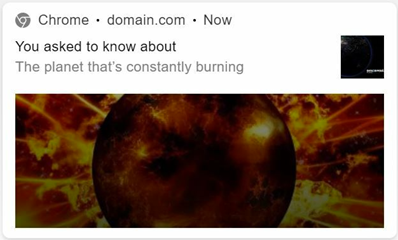
At this point, you’ve asked your visitors to indicate their preferred content in the opt-in request, so those cat lovers will be ready to click on push notifications filled with some great cat memes.
How To Send Customized Push Notifications
Using your push notifications platform, set multiple campaigns up and send different alerts to different groups of users. Their choices can be one of these parameters.
Let them know you’re taking their preferences into account.
 Screenshot from Notix.com, June 2022
Notix allows you to set up a variety of customer parameters, such as:
Location-Based Targeting
Deliver notifications that consider the user’s location and interests.
 Screenshot from Notix.com, June 2022
Individual User Targeting
Track where a user leaves a page and invite them to come back to finish what they were doing.
 Screenshot from Notix.com, June 2022
Time- Or Delay-Sensitive Updates
Keep customers and subscribers updated so that they don’t run into any surprises!
 Screenshot from Notix.com, July 2022
 Screenshot from Notix.com, July 2022
You can customize push notification campaigns in many different ways.
The important takeaway: when a user invites you to their home screen, use that space wisely!
Don’t send them every notification. Create a custom experience that improves their interaction with your brand, whether they’ve purchased an item or read a news story.
Notix Can Help You Customize, Track & Refine Push Notification Campaigns
Once you’ve set up your campaigns, you need to test them. You may want to run multiple tests, and try different versions of your notification design.
It’s helpful to have a service that makes it easy to customize and track your campaigns.
For example, Notix’s push notification campaign features are great for increasing user engagement and re-engagement.
So, plan, customize, and experiment with your push campaign to engage and re-engage your users in the most efficient way! And Notix can always help you with that. Good luck!
Featured Image: Image by Shutterstock. Used with permission.
